Saturday, August 24, 2013

Chaos Spacemarine Conversion: Bottom of the Bitz Box

 Scraping the bottom.  These are some of the cooler bits that I have left.
Several years ago you would have had to cut up lots of things, done a bunch of insane sculpting to get things like this.  Now its just slap it all together.
A lot of the bits are so good anymore, it makes it very much harder for someone like myself to sculpt conversion pieces for things, as I'm not as good as these guys that do it for a living.  I guess some of the luster is gone for me on converting things like this.....

This mini like the others that I have been showing will be auctioned off later on ebay.

Wednesday, August 21, 2013

Chaos Conversion: Newest Iron Warrior

 Getting ever closer to the end of my chaos space marines.  I've had thiese bits in my box forever it seems.  So I decided a Warsmith was in order. 
 The model is really just a whole lot of bits and relatively minor conversion work.

 I did add a partial skirt of mail to the model.  When sculpting mail, I use a ball stylus.

 I think the base turned out really well.  A standard 40mm round, but dressed up with slate chips, HO scale RR ballast, and some pieces of sprue resin.

Monday, August 19, 2013

A New Nurgle Space Marine....

 ....to join the legion of pestilence.  It's been awhile since I have done a nurgle anything.  So I thought as the last of my chaos space marines were getting modeled up that I had to model one with this cool looking head from the Bugman and Battle Road. 
 I then added some nurgle effects to the armor, and also that extended boltgun that I found in my chaos bits box.  Not sure when or why I made an extended bolter but it was a cool bit.
 Above you can see some of the nurglely details.
 Below is the left side.  Most all of the nurgle effects that I do are by using a ball stylus sculpting tool and a mechanical pencil after smoothing some greenstuff over the area that you wish to nurglefy.  The reason I use greenstuff for this type of sculpting is that it is the best in my opinion for holding these more organic (putrefied) shapes than say brownstuff or Procreate.
 Below is a straight on shot of the marine.  You can also see the mail that I sculpted in the front.  Greenstuff is great for this also.  The other thing that has to be said about GS, at least for me is that I can see it easier.  The neutral gray of Procreate is very hard on my eyes, and the brownstuff is also hard to for me to see well.
 And to cap it off is this base, something that was in an Adepticon gift bag.  Don't know who's base it is but it certainly has that chaos look to it.
This piece will eventually go up for auction on ebay.

Saturday, August 17, 2013

Modeling Bretonnians: Part 6 - More of the Foot Knights

 I finished up some more of the foot knights.  This one armed with a falchion.
 This one with a Morningstar.

And this one with a bird???
Nearing end of the Bretonnians.

Wednesday, August 14, 2013

Chaos Space Marine Conversion

 Well as I'm finishing up the aborted Bretonnians, I decided to finish off the last of my chaos space marine models from my bits.  When these are gone that will be it for my Chaos Space marines.  Well except for the army that I built many years ago that is sitting in a box somewhere.
This one was a quick conversion.  I like this head and the running pose.  It needed a tabard.
Not much of a stretch on the conversion.  This model and the others along with the Bretonnians will be going up for auction soon.

Tuesday, August 13, 2013

Looking back at a few laps around the speedway

Last Friday I did more racing and for the first time turned my camera around to see what was going on behind me.  This was an experiment during the hot lap practice.  I plan to film a race or two like this.  With what happened last Friday a certain couple of karts are probably going to make that interesting as I think they will be taking it out on my rear bumper.


The white kart behind me is the one that had a problem with me.  If you listen close to a couple of the laps you can hear me just touching the rev limiter at the end of the straight away.  So I've max'd out the gear ratio, at least with the driver I have off the clutch.  May try a tooth more of driver.

Monday, August 12, 2013

Modeling Bretonnians Part 5: The Foot Knights

Originally when I had first started this project, I had planned to use knights on foot in place of the Grail Pilgrims, a sort of "counts as" for the army since I really did not like the pilgrims.  I will probably still do that, but it will be much better looking knight models from the Fireforge ranges.

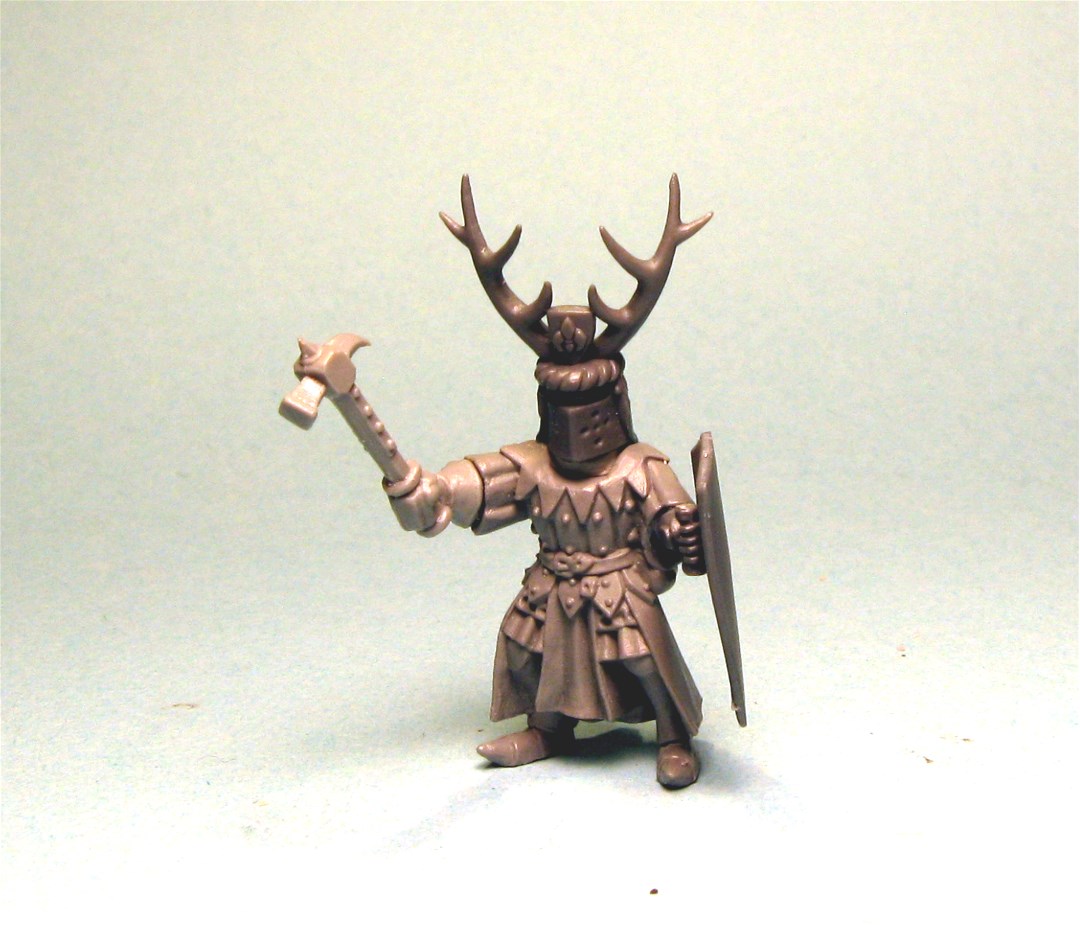
The knight above is the simplest conversion using the peasant champion's body and mace, with a mounted knight's shield.

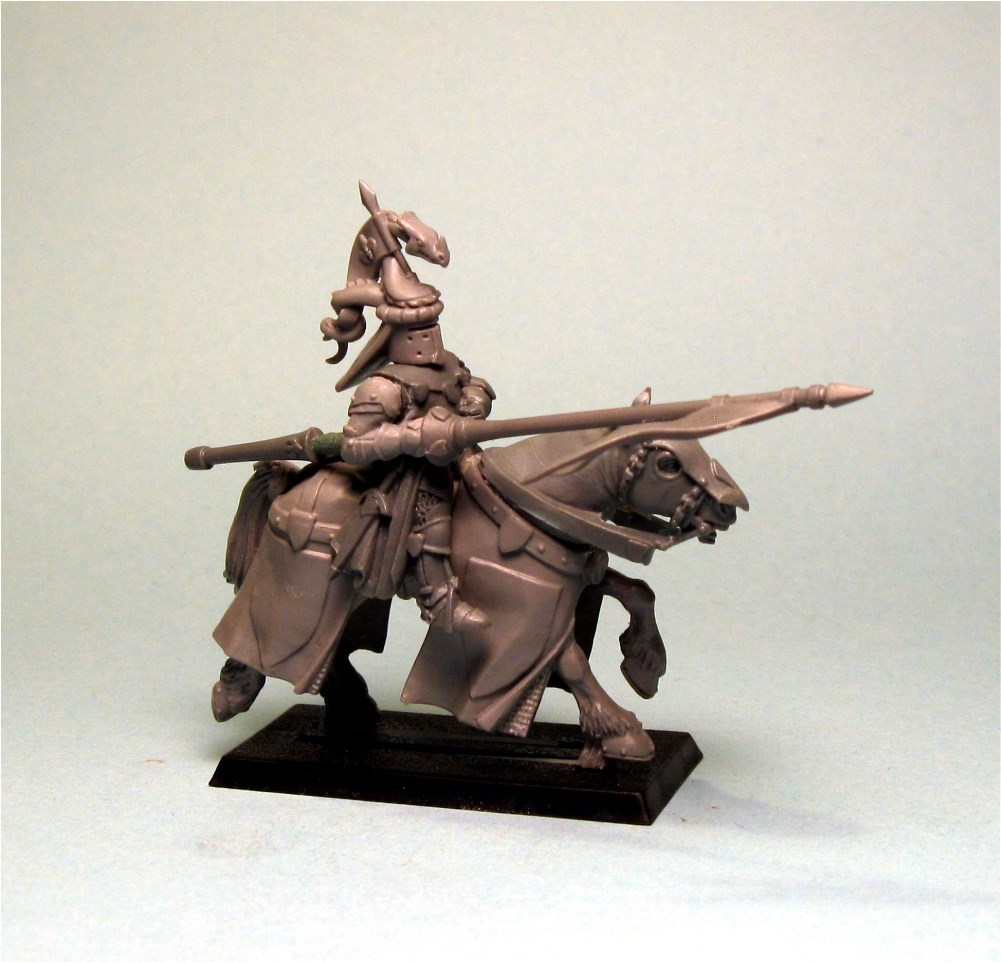
 Below is another of the character bodies from the peasant box set. Another simple conversion, this one uses a warhammer from the Empire wolf looking knights.
 When you do this type of conversion you may need to modify and add the head dress draping.
 Below is another of the knights that would have been used in the more rear ranks.  The helm on this one is one of the hanging bits with the chain simply removed.
A little bit of mail sculpted around the neck.  Another thing that you may need to do when doing these conversions is to add some GS putty under the helm around the neck areas if you have some gaps.
 Below a view from behind of the mail.  The shield is a an extra from Fireforge.
 And below, another of the easier conversions using the champion body.  This helm has the decoration removed from it and the shield is cut down peasant shield.
That's it for now from the aborted project.  And again these will be going up for auction.  I'll post links to those auctions in near future.

Sunday, August 11, 2013

Modeling Bretonnian Knights Part 4

 One of the things that I did a long time back with the Bretonnian models was also to convert the horses that the knights rode.  One head in particular is  fairly simple to convert.  I think this gives a really interesting look to their mounts.
 Next up is another of the knights.  Straight up easy conversion on this one.
Simply just added a boar with a knife in it to match the helm decoration to the horse.
As stated previously, all of Bretonnian stuff will eventually end up being auctioned off on Ebay, as this is an aborted project.  Fireforge stuff will be done in place of this for my future knight projects.


Wednesday, August 7, 2013

Old Stuff Wednesday - August: Crimson Fist Captain

 Somewhere around 2007.  I bought several of these metal Captain models a long time ago.  I the intention to include them in my Cerulean Templars army, but never did.  Then in 2006-7, I painted a number of one off pieces up just for fun.  I later sold the bulk of them. 

I remembered long ago painting a blue power sword with crackling energy and I definitely wanted to do that again.  I think this sword turned out pretty good.  I carried the color scheme over to the plasma pistol.
 My favorite color is blue, so I'm a sucker for cool looking blue schemes and consequently have always felt that I paint blue very well.  And having painted lots of Khorne over the years I think my painting of red gets a good depth and vibrancy in the color.  I did hand paint the crimson fist symbol on the open shoulder pad.
I also hand painted it on the backpack.
Wish I would have done something different with the base.  That was a bit of a let down.
I also hand painted the skull on the knee pad.  Its a fun model and cool pose.

Until next time keep painting and building models.....

Thursday, August 1, 2013

Modeling Bretonnian Knights: Part 3

Back with more knights.  The above and below shot shows another of the knights that I converted to have a couched lance.
The next one shows a bit harder conversion, removing those ugly embossed shields from the horse's caparison.

Like a previous knight I again went back and removed the lance and added a big sword.  The sword is from a Reaper Miniatures weapons pack.
This knight I gave a cape.  I once again used a cape from Fire Forge's Teutonic knights kit again.
Below are some shots of one of the horses.  I first shaved off the embossed shields with a sharp Xacto, while the horse body was in halves. 
I then went back in with Brown Stuff and Green Stuff to smooth out any areas that had scarred up from the removal and in some cases I added some additional folds.