Saturday, October 29, 2011

Warhammer Movement Tray Tutorial ... Part 2

The following is my new way of constructing the trays, but keeping a similar look to what was done previously. Below you see that I laid out the tray dimensions using a marker and my steel carpenter's square. I'm building two at once here for my 6-wide Chaos Knights units.

Nowadays, I just use strips on the front and sides, leaving the back open for the expansion of the unit or addition of a character model.   I also build the trays slightly wider than the bases usually one or three tenths of an inch wider to help fit in that odd conversion, a bit of slop if you will. If you have messed around a bit with GW's modular trays, you'll note a bit of play in them also. Using the thick plasticard and strips you can also add magnets to them. On the pictured VC Bashin' Orcs tray in the previous post, the commissioner instructed me to use GF9 bases, so that tray has magnetic sheet in the tray to work with the GF9 bases, as does my Knights Hospitaller unit.

So now we have the below, the general layout of what the trays will look like.  The 0.2" lines are the general guidelines for the strips that will come later.  The 0.3" is the outside of the tray.  I normally make that a bit larger nowadays (out to about 0.4-0.5"), but with these I'm trying to somewhat match what I had done previously.

If you have not worked with plasticard before, all that needs be done with it to cut it to shape, is to score the cut line with your razor knife. Here I use the steel edge of my carpenter's square as the guide for my xacto blade.
Then take the plasticard and bend it all that scored line.  
The card will snap along that scored line.
Do this a couple times, now I have the two tray bottoms.
Next up, is the strips.  Similar procedure as the above.  Score the strip, bend and snap it along the scored cut line.
Here you see a bunch of the pieces.  One thing to do that make things go much quicker is to glue the sides on the tray.  Then lay the front strip on the tray, mark it to the right size and cut it, no need to even measure it out.   
Then glue the front strip into place, and you get what we have below.  Wow...very square, uninspiring, and just plain boring when placed next the end goal.  We have to fix that.
First thing is get rid of that square shape, there is enough square corners in Warhammer, we don't need to add more to that.  What I'm looking for is a softer shape.  So below I took my clippers and clipped the corners.
Next up I will round off the corners, which you can do that with a file or sander.  Here I have cheated and used my power tool, a dremel.
The above is still kind of boring, but you may have noted some of the pictures had the Aves Apoxie Sculp pictured, we'll soon fix all of that boredom.

But first...I'm still attempting to mimic what I have done in the past, so I have to do a bit more work.  Nice irregular, and semi-random edges.
So there you have it...the basic tray construction.  Next up...I will breakout the Apoxie Sculp.

Saturday, October 22, 2011

Introduction to My Method of Making Movement Trays for Warhammer

Well here we have it, a long awaited and promised tutorial on how I make my movement trays. The materials that I use have not really changed that much over the years since I began playing Warhammer, but the way I build them has evolved over the years. This is just one way to make these. There are many other methods, and it is not the cheapest method. If you are looking for cheap, then you probably want to look elsewhere at say GW's modular tray kit or Rendra. This method is my favored method for building trays that can display a very high end detailed army.
 I like using making my own because it allows me to do a number of things in addition to personalizing my army. 


I like my movement trays to serve two purposes:

1.   Accentuate the basing scheme and/or theme of the army.  For example, my Chicago GT, Khorne Demon army was about blood and an over the top demonic like pits of hell thing.  The basing needed to emphasize that  for the bloodletters and other models.  So I even extended that further to the movement trays.  Painting internals of the tray to match the bloody pattern.


Another example, the VC Bashin' Orcs, the theme is beating up skeletons and zombies.  I try to add to the detail of the army by doing this.

2.   Have width to protect the miniatures (It seems there is always a game in a tourney, whether intentionally or unintentionally where your opponent slams his all metal unit into yours. When you spend lots of time on conversion and paint work, you do not want this to happen, especially to your crazy front rank conversions.)

In this particular tutorial, I'm building the movement trays for my Warriors of Chaos army. This is an army that I started several years ago. So now that I'm expanding this army, I am going to build the trays very similar to what I did in the past, ie. the one pictured below.


The main materials:

  • 1.5 mm or 2 mm plasti-card or sheet styrene (Evergreen and Plastruct are just two popular hobby suppliers of this material)


  • 3.2 x 4.8 mm plastic styrene strips.


  • your favorite glue for plastic


  • Aves Apoxiesculp


  • The tools:

  • Ruler/triangles, steel ruler / Straight-edge, carpenter's square


  • Marker


  • Cutting tools


  • Here you see a picture of one of my existing Warriors of Chaos movement trays. This was built for my Chaos Hounds or a 5-wide Cavalry unit.


    The next picture is the underside of the tray. Here you can see the randomness with the Apoxie sculp exposed in areas adjacent to the plastic. When I built this tray, I actually first built the tray and then drilled some wire into the plastic styrene strips on the edges of the tray. The wires are what hold the apoxie sculp in place, similar to the reinforcing steel in concrete. That's a very time consuming and somewhat tedious way to construct the tray.
    In the next post, I will begin walking through my new way of constructing the trays, but keeping a similar look as we build movement trays for my two Chaos Knights units.

    Wednesday, October 19, 2011

    Old Stuff Wednesday - October...The Warboss

    Hey...I'm finally back from my self-inflicted hiatus.  Soon I'll be back up to speed, settling in to the new place.


    Still Wednesday here in the midwest, so for Old Stuff we have an Ork Warboss that I painted several years ago.  This miniature painted the same year as the Crimson Fist vs Grot from last month.  I remember being quite pleased with the results, I thought the conversion worked well.
    This was my first real click with painting red.  When I finished the red with the helmet, I felt like I finally captured that color the way I wanted.
    The grot in the little crow's nest was something that I had always thought really fit for this grot.  The flesh came out well, the crow's nest I think turned out pretty decent.  Lot of little scrapped bits went in to that.
    
    I also think this the first miniature where I started understanding corrosion and use of really thinned paint washes.   Not a single ink was used in this miniature, its all acrylic.
    The base certainly could have been better, but that's how it goes sometimes.

    So up next the start of the long awaited and promised "How I Make My Movement Trays" for fantasy and WAB.  Need to work on a better title...

    Wednesday, September 28, 2011

    New Blogs to Follow and We Start'em Young

    As I'm in the process of moving, I have no really new stuff to show, as everything is boxed up.  In the past people like Sons of Tauraus have nice enough to plug my blog, so thought I would plug a few that I discovered.  So with that in mind some of the newer blogs that I'm following:
    Mr. Bugman:  This is Navarro's blog, an old grizzled forum vet.  Does some of the best Nid and bug like conversions and scratch sculpts I've seen, and lot of other cool stuff.  He's also sculpting things for a number of people and miniature companies.
    http://mr-bugman.blogspot.com/

    Legion of Plastic:  This is another of the grizzled forum vets, from DakkaDakka fame, Migsula.  One of the best converters on that forum, does a lot of detail crazy conversions in 40k.  He is also in the process of moving, but a lot further than me.
    http://legionofplastic.blogspot.com/

    Scar's Miniature Blog:  This is Dark Ritual from Warseer Forums.  A very good converter and painter of things Fantasy.  In his blog right now he is doing up a bunch of good Ogres.
    http://scarminimadness.blogspot.com/

    Small-scale Ramblings: This is the Hoff from Warseer Forums.  Another of the very good historical and fantasy modelers and painters from down under.  His blog is just underway, and his most impressive work is buried in his posts on Warseer, but great work all the same.
    http://smallscaleramblings.blogspot.com/

    The Magnificent Bastards:  This is an odd group of gamers, most of them are hard to put up with in person.  But don't let the name of the blog fool you or offend you, they are good gamers and do offer so many tips for all of you fantasy people out there. 
    http://www.youmagnificentbastards.com/

    And yes below is my 9-year old neice, in her go-kart.  Raising another speed demon.

    Sunday, September 25, 2011

    Another batch of Space Wolf Scout Conversions

    This is the second batch.  Again I'm using chaos marauder legs with the space marine torsos.
    As with the previous batch I went with a bunch of gear on them.  There is also a variety of heads used in this batch.  Throw in a Catachan arm and some marauder arms.
    Makes for some buff scouts. 
    Here catch my grenade.  Both of these heads are from the Empire sprues.
    Thats it for now on the Chaos Marauder / Space Wolf scout conversions.

    I will also probably be going black towards the end of the week, as I am moving once again and changing internet service providers with the move.  As well I will be living between two places until I get a bit of work done in the new place.  Not sure how long all of this is going to take, but I will be back and updating a little bit here 'n' there probably for the next 2-3 weeks until I get settled packing and then unpacking.

    Saturday, September 24, 2011

    Space Wolf Scout Conversions....Using Chaos Marauder Parts

    First five of these conversions.  When you have lot of left over bitz as I do from the chaos marauders you'll find that they can make some interesting things.
    I have yet to work with the plastic space marine scout kit, when I was playing 40k all we had were the metal scouts.  Anyways, I don't think scouts look rugged enough, or carry enough equipment.  So I wanted to kit these guys out a bit with lots of gear.
    The above model uses chaos marauder legs and muscled arms.  The rope is from the plastic mordheim kit.
    For these to I converted the one head and the head on the left is a chaos marauder head.  Both shoulder pads the one on the right are from the chaos marauder kit.   
    Got to have a trusty shotgun.   Shield is from the beastmen ungors, and the bag from the kroot.
    This one uses an Empire head from the mordheim sprue, one shoulder pad from the chaos marauders and the small one from the kroot.
    This one sort of has the Wolverine sideburns going on.  The axe is all maruader.  And yep a crossbow strapped to his back for that quiet mission where the bolt pistol is way too loud.

    Thursday, September 22, 2011

    A Mutant Marauder...An OOP Marauder...A Reaper Marauder

    Next up for my Chaos Marauders is converted mutant.  The new gor torsos really have alot more detail to them.  I do like the gore that they have.  It helps impress the evilness of chaos.
     This mini has a bunch of parts used to make it.  Definitely will fit in with the others.
    The next miniature is a old OOP GW metal marauder that I converted to a great weapon armed marauder.  I still like these old chaps.  This one will be one of my middle rank and file models.
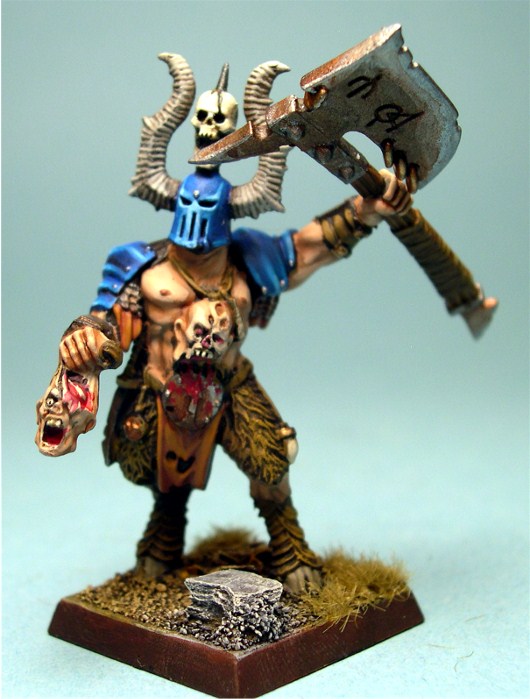
    And there is this old boy, another of the Tre Manor Reaper Miniature sculpts.  Not his best work, but a cool miniature in my book.  I'll probably put it in the middle ranks.
    Getting closer to assembling the jigsaw puzzle of units, meshing old work with all of this new work.  I will also be doing a long awaited tutorial on how I build movement trays very soon for all of the Fantasy and Historical readers.